Uploading Files To ENA
Introduction
You must upload data files into your private Webin file upload area at EMBL-EBI before you can submit the files through the Webin submission service. The most user-friendly approach is Using Webin File Uploader.
Please note that this is not necessary if you are using Webin-CLI, as it handles the upload process for you.
All upload methods described below will require you to have registered a Webin account, the ID for which resembles ‘Webin-XXXXX’. Always enter this with an upper-case ‘W’. Register an account or reset your password at the Webin login page.
Keep Local Copies
Always keep a local copy of the uploaded files until the files have been successfully submitted and archived. The Webin file upload area is a temporary transit area which is not backed up. Any files on the area are subject to our fair use policy (see below).
File Upload Options
You will upload files to your private Webin file upload area using either FTP
or Aspera protocol through the webin.ebi.ac.uk service. The authentication
is done using your Webin submission account name and password.
Your username resembles ‘Webin-XXXXX’. Register an account or reset your password at the Webin login page.
There are a number of ways to accomplish the upload, detailed below:
If you have problems with using these services, you may find help in the appendix:
Using Webin File Uploader
Files can be uploaded using the Webin File Uploader, a Java web start application downloadable from Webin Portal or the below link. To use this program, follow the below instructions in video or text format:
Launch the application (Mac users please see further instructions below),
Enter your Webin username in the
Usernamefield, ensuring the ‘W’ is upper-case.Enter your Webin password in the
Passwordfield.Browse into the local
Upload Directorycontaining the data files you wish to upload using the...button.Click ‘okay’ to see the list of all the files contained in the selected directory displayed in the Webin File Uploader window
Choose
Overwriteoption if you wish to replace any existing files which have been previously uploaded.Choose
Upload Treeoption if you wish to preserve the directory structure when uploading files to the Webin upload area. By default, the files will be uploaded into the root directory of your Webin upload area.Select the files to upload. You can use the
Select Allbutton to select all the files for upload.Click on the
Uploadbutton.
Additional Instructions For Mac Users
When downloading the application the following dialog box will be displayed:
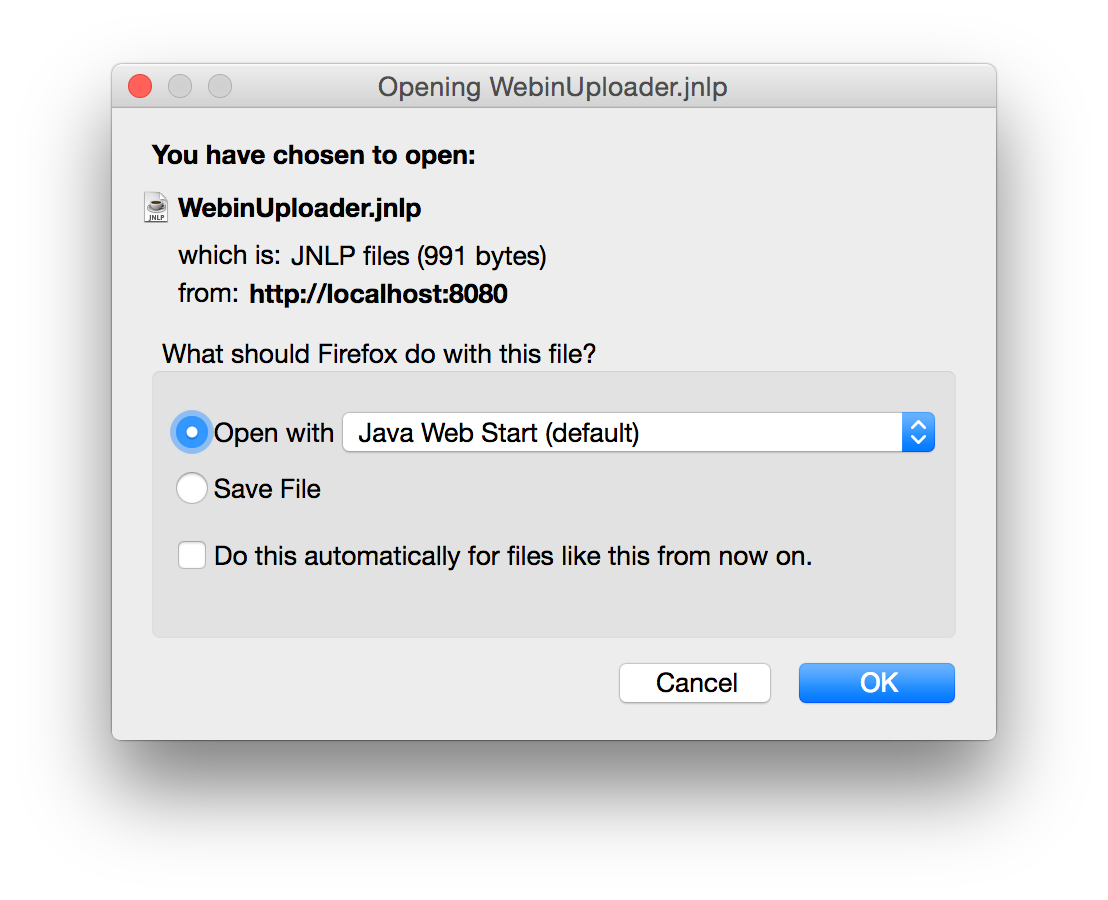
Select the Save File option to save the WebinUploader.jnlp file to your
local download directory.
If you selected the Open with option instead of the Save File option
then the following dialog box will be displayed:
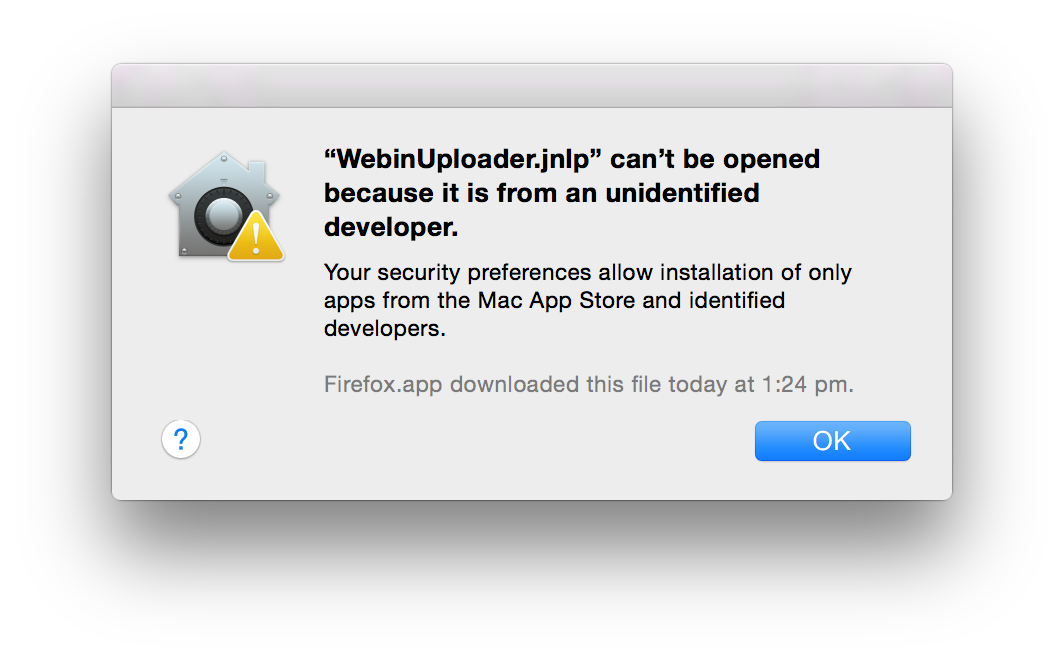
In this case please select OK. This will save the WebinUploader.jnlp file
to your default local download directory.
In order to run the File Uploader application, open your file explorer and go
to the directory where the WebinUploader.jnlp file has been saved.
While pressing the ctrl button, select the WebinUploader.jnlp file then
select the open option.
The following dialog will now be displayed:
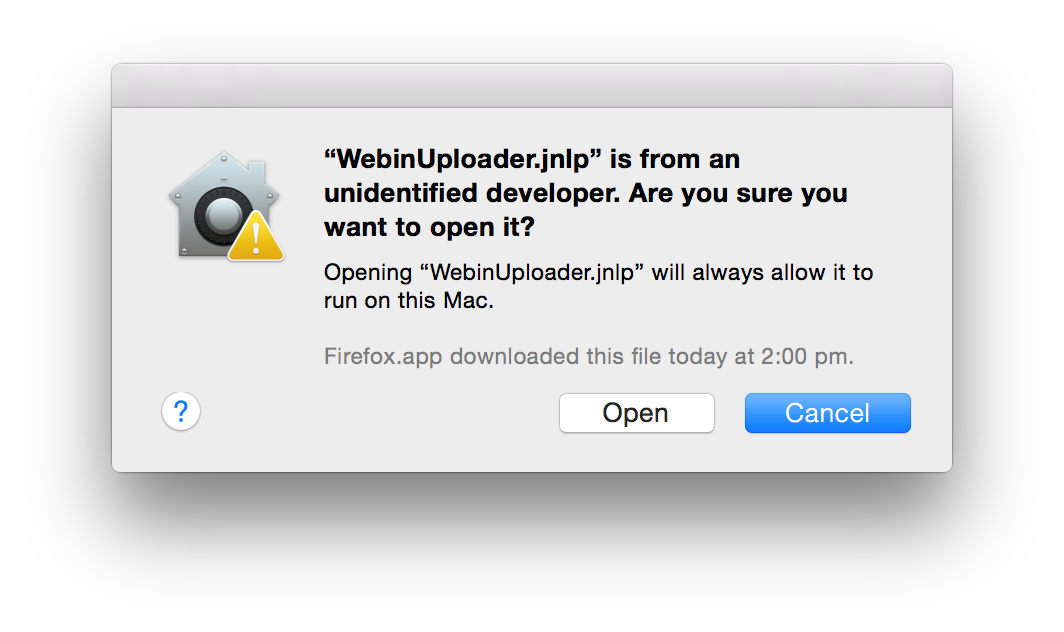
Now select the Open button. This will launch the the Webin File Uploader
application.
Uploading Files Using Command Line FTP Client
This section explains how to upload files to us using a command line FTP client in Linux or Mac. The built in FTP tool for Windows command line does not support FTPS so Windows users are recommended to use an alternative:
The below instructions describe how you may upload your files to us through a command line FTP client in Linux or Mac.
Open a terminal and type
lftp webin2.ebi.ac.uk -u Webin-xxxxx, filling in your Webin usernameEnter your password when prompted
Type
lscommand to check the content of your drop box.Use
mput <filename>command to upload files.Use
byecommand to exit the ftp client.
Note that in your Webin username, the ‘W’ should be upper case.
Using FileZilla On Windows
FileZilla allows you to transfer files via FTP through a user-friendly graphical interface.
Download and install FileZilla. If you are not administrator of your computer then download the portable version of FileZilla.
Use the binary mode:
Transfer menu -> Transfer Type -> Binary.Open the ‘Site Manager’ menu with the button at the top-left
Use the ‘New Site’ option
Enter details to match those in the screenshot, adding your own Webin username and password:
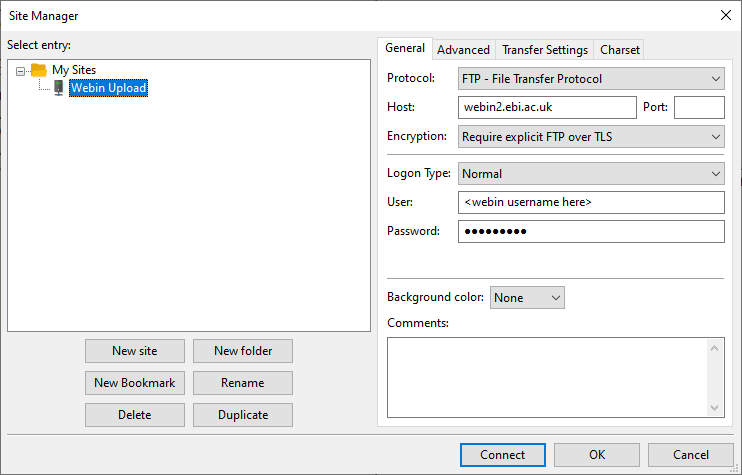
Click ‘Connect’
Search for the file(s) you want to upload using the tree on the left panel.
Create directories in your drop box (if necessary) using the tree on the right panel.
Drag and drop the files you want to upload from the lower left panel to the lower right panel.
Once your transfer is successful, close the application.
Using Aspera ascp Command Line Program
Aspera is a commercial file transfer protocol that may provide better transfer speeds than FTP.
Download Aspera CLI from here.
Please select the correct operating system. The ascp command line client is
distributed as part of the Aspera Cli in the cli/bin folder.
Your command should look similar to this:
ascp -QT -l300M -L- <file(s)> <Webin-N>@webin.ebi.ac.uk:.
The -l300M option sets the upload speed limit to 300MB/s. You may wish to
lower this value to increase the reliability of the transfer.
The -L- option is for printing logs out while transferring,
The <file(s)> can be a file mask (e.g. *.cram), a list of files or a
single file.
<Webin-N> is your Webin submission account name.
Using Windows File Explorer
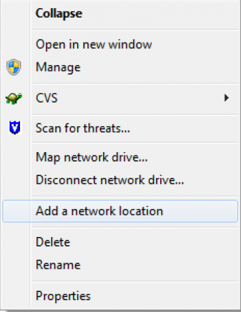
Right click Computer and select Add a network location from the menu
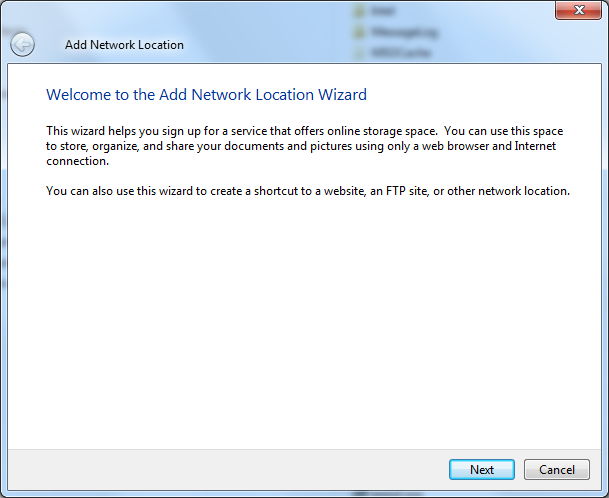
Click Next
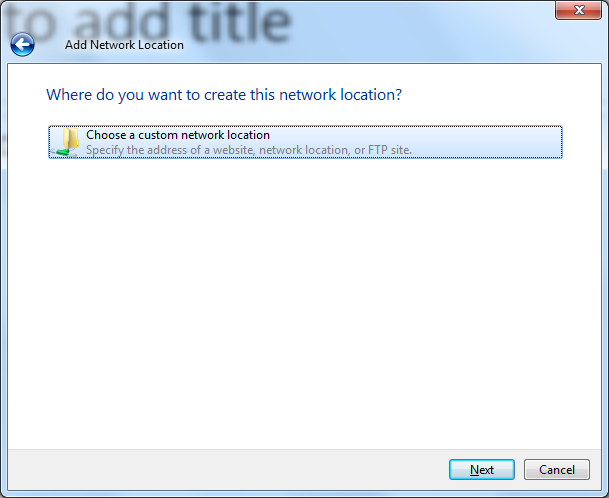
Select Choose a custom network location and click Next
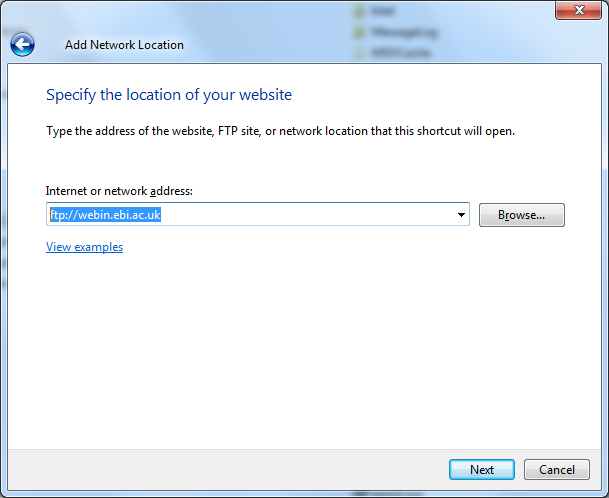
Type ftp://webin.ebi.ac.uk in the Internet or network address field and
click Next
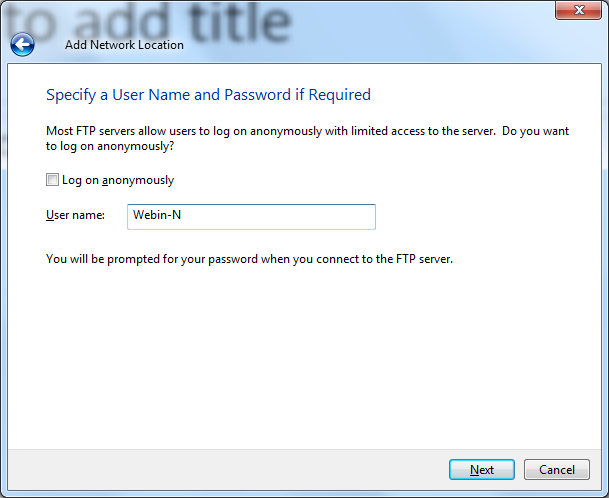
Unselect Log on anonymously, type your Webin user name in the User name
field and click Next
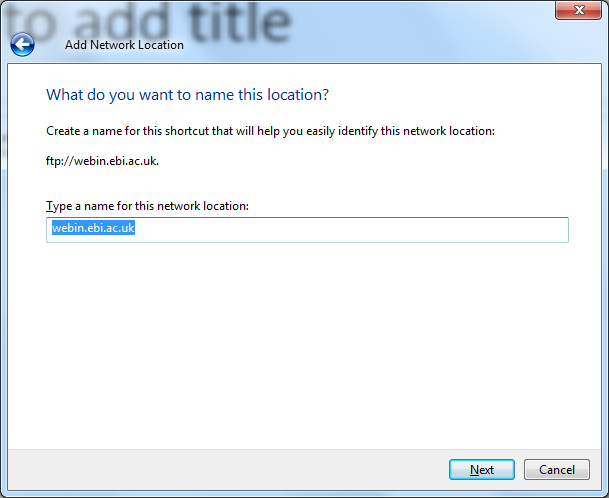
Type a network location to show in Windows Explorer e.g. webin.ebi.ac.uk
then click Next
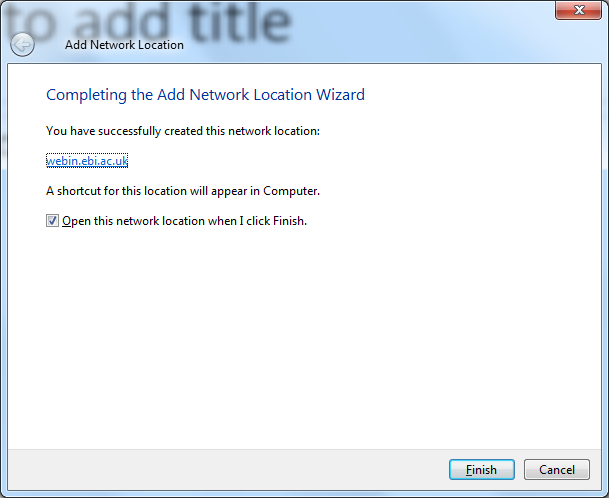
Click Finish
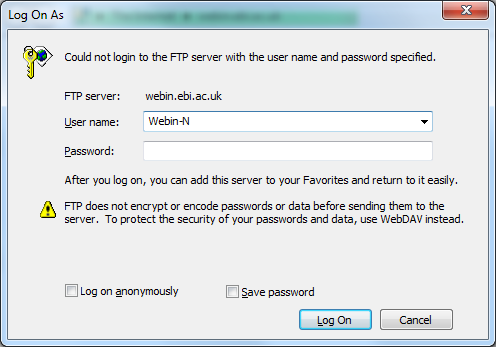
When using the new folder you will prompted for your Webin password. Type your
password and click Log on
Appendix: Configuring Your Firewall For ENA Upload
While most users should not encounter problems in this area, it may sometimes be necessary to configure your firewall to permit upload of data to ENA. Users attempting to connect from an institutional network may find that their IT services department has placed restrictions on their ability to connect to FTP services. This information could be useful in getting our service whitelisted.
FTP is used in passive mode and connection will be opened to one of the below ports:
40000
50000
Access to port 21 is required for the following IP address ( webin2.ebi.ac.uk ):
193.62.193.143
File MD5 Checksums Value
Large file transfers do not always complete successfully over the internet.
An MD5 checksum can be computed for a file before and after transfer to verify that the file was transmitted successfully. You must provide an MD5 value for each file submitted to the archive. We will re-compute and verify the MD5 checksum to make sure that the file transfer was completed without any changes to the file contents.
Calculating this value is covered in Preparing A File For Upload.
Invalid File Submissions
All files are subjected to a format check done by Webin. This does not occur until after you formally submit the files. You will generally be notified of this by email, and may be required to correct and reupload the file. Advice on this can be found in our Common Run Submission Errors FAQ
Fair Use Policy
ENA is a permanent and comprehensive data repository for public domain sequence and associated information. Data submitted into this system are routed transiently through users’ private data upload areas until such time as a submission instruction from the user, through his/her use of the Webin system, leads to the validation of the data and the movement of files from the data upload area into the ENA.
The data upload areas are provided as a temporary place in which data are held while in transit. As such, they are neither intended nor suitable for any longer-term storage of data. Such storage is provided in ENA itself. Once in ENA, data can be released immediately following submission or can be held private prior to analysis and literature publication if required.
We expect any given data file to remain in a data upload area for no longer than 2 months before the instruction is given by the user to submit the file. While we attempt to remind users of this policy at the 2 months time point we reserve the right to routinely delete any data files that persist in them for more than 2 months.
We place no absolute limit within the 2-month period on the total volume of user data that may exist in a data upload area at any one time and are keen to accommodate the largest submissions where possible. However, we strongly encourage continuous data submissions where files are uploaded and submitted in small patches of few Terabytes or less and expect that volumes would not exceed 10 Terabytes under normal circumstances. Unexpected heavy use of the data upload areas may have an impact on other Webin users and we are grateful for users’ attention to this aspect of our fair use policy.