Register Samples Interactively
Samples represent the source material that a sequencing library was produced from. A sample may be connected to reads, assemblies and various types of analysis data. Samples add context to the data associated with them, making your data more searchable and understandable.
All samples must conform to a checklist of values which depend on the type of sample. The easiest way to view the available checklists is the sample checklist portal.
There are three steps to registering your sample(s) through the Webin Portal:
Select and customise a sample checklist
Fill out a template spreadsheet
Validate and submit the template spreadsheet
If you are unsure, you can always try this process out consequence-free using the Webin Portal test version.
Step 1: Select A Sample Checklist
To begin, log in to the Webin Portal and select the ‘Register Samples’ button.
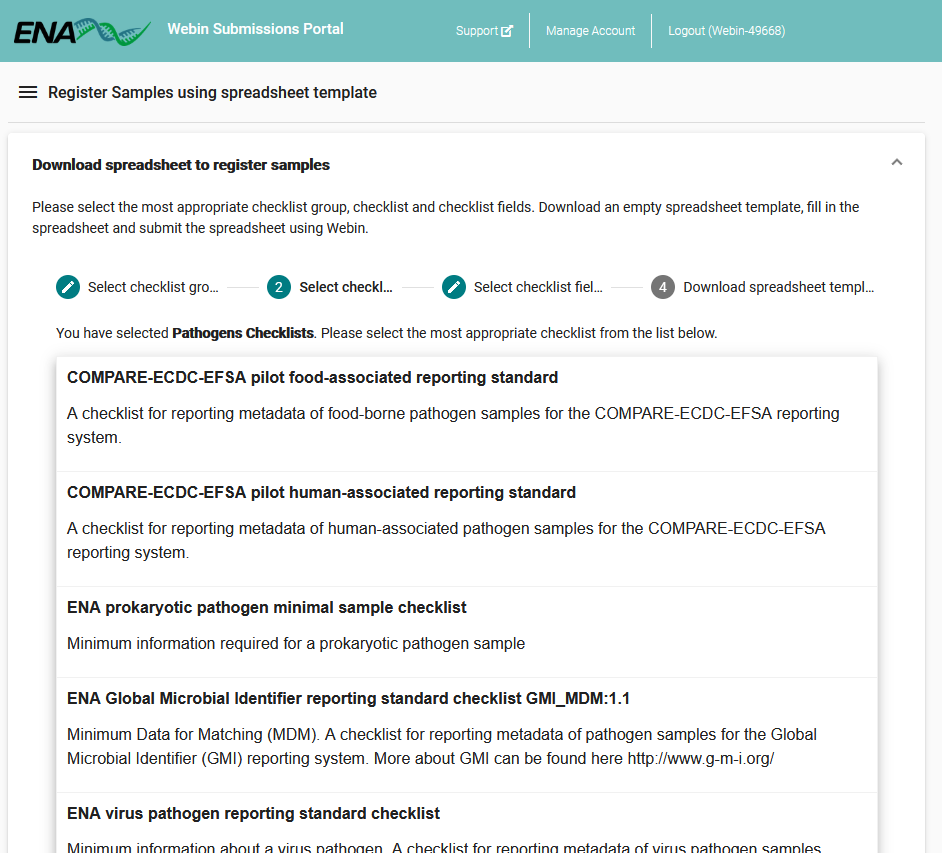
Click ‘Download spreadsheet to register samples’ to expand the checklist selection menu
You will be presented with groups of checklists: click a checklist group to explore its members, then click the most appropriate one
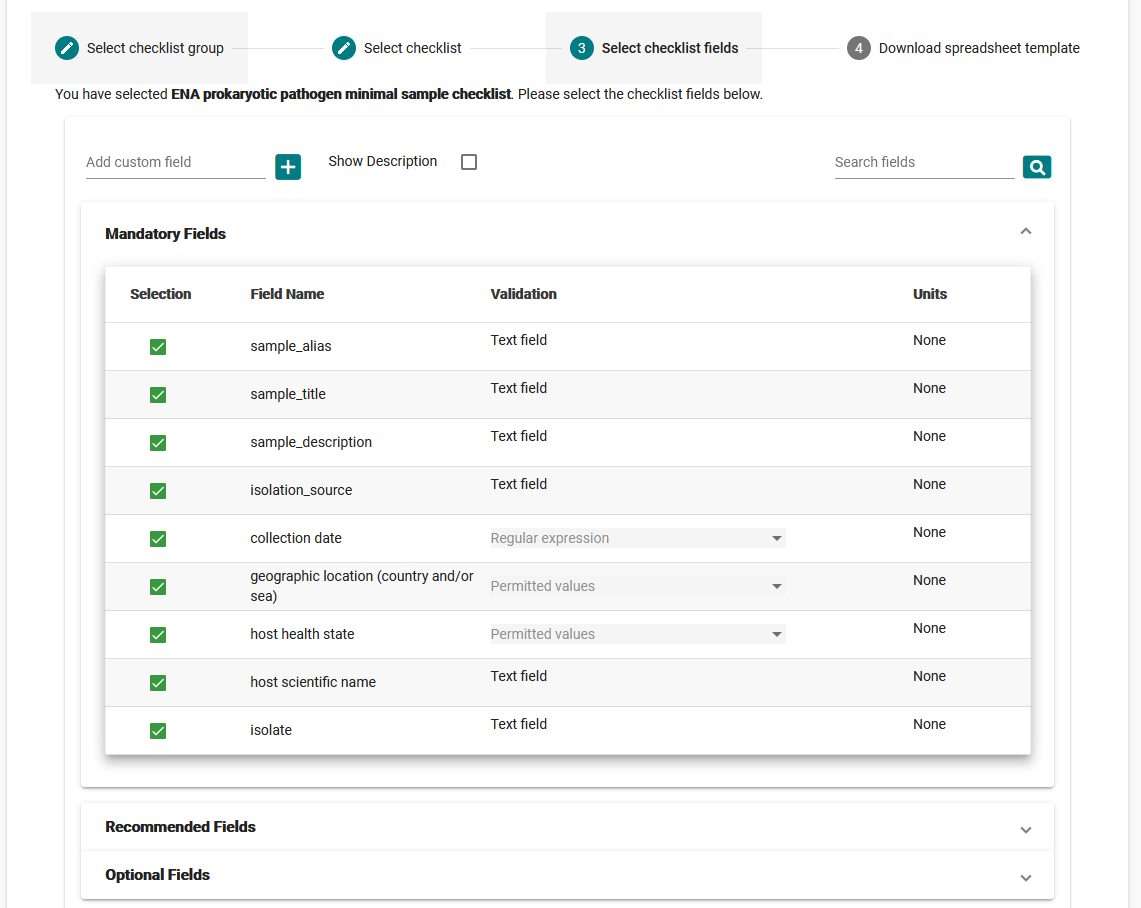
Next, you will be presented with lists of checklist attributes, grouped by whether they are mandatory, recommended, or optional. Expand each to see the range of attributes included in your checklist and their field requirements. Optional fields will be deselected by default, while recommended ones will be selected, so review these carefully to ensure all appropriate fields are selected. Note the ‘Add custom field’ box to the top-left, which allows you to define additional attributes not included in any checklist
Finally, click ‘Next’ and then the ‘Download TSV Template’ to get a spreadsheet based on your selections so far
Step 2: Complete Template Spreadsheet
Once you have downloaded the template spreadsheet, you should open it in an appropriate spreadsheet editing program, such as Microsoft Excel or Google Sheets.

Consider the following tips as you complete your spreadsheet:
Do not remove the first three lines of the spreadsheet, which specify the checklist in use, field names and units row. Please retain all of these rows for a successful submission
Enter data in row 4 of the spreadsheet onwards. Use row 3 (#units) to specify units where required by the checklist. Please retain this row even if no fields require it
Use the sample checklist portal to look up the requirements and restrictions for each field
For any mandatory terms you are not able to provide information on, please select an appropriate term from the INSDC Missing Terms List
You can add custom fields by inserting new column headers
Do not edit the existing column names
Use only valid ASCII characters
When you come to submit the file must use one of the following extensions: .tsv, .tab
Once you are satisfied with the content of your spreadsheet, be sure to save it then proceed to the next step.
Step 3: Validate And Submit Spreadsheet
Return to the ‘Register Samples’ interface in Webin Portal and this time expand the ‘Upload filled spreadsheet to register samples’ option. Use the ‘Browse’ button to find the spreadsheet you wish to submit, then click the ‘Submit Completed Spreadsheet’ button.

At this point your samples will be validated and if accepted, accession numbers will be reported. If there are errors with the information you have entered, these will be reported to you.
Note that at this point you have not submitted any data, but you have laid the groundwork for this by providing sample metadata.
See Webin Portal Reports for advice on retrieving information about these submissions.